Tuesday, January 11, 2011

Soap Sock

Happy Tuesday!
Now this is a simple little project inspired by my late grandmother, Patricia. Post World War II there was rationing  going on all over the place, it of course effected the everyday man, woman and bar of soap  child. My crafty grandmother decided to make a "Soap Sock" out of foam to conserve soap and to prevent it from getting all icky and melted in the shower (ewwwwww.....) - if she hadn't done this project, I'm sure they would have been much smellier people.
I was so grossed out by melted soap that when I cleaned the shower I would literally chuck the bar away because it just didn't seem clean enough to be in the shower.... So when I mentioned my grossed-outedness to my mom, she told me my grandmother's story and I thought I had to think of something like that. I still don't know how the whole foam idea would work, and I really liked the idea of a washable "Soap Sock", so I played with some scraps of Nylon Lining (like you would find in a windbreaker jacket), some cotton chording, and a wash cloth (well half of one anyways).... Here is what I came up with:


You just slide the bar or soap in the top, pull the drawstring closed and Voila! No more icky melted soap. The nylon lining prevents the gooey soap from sticking to the terry cloth and also helps to create a lather when washing. It never gets smelly and when the soap is finally gone, I just wash and pop in new soap - I made one for Kevy and he LOVES it - the soap I think is coming up on it's 2 month life now. Saving on soap - CHA CHING!

Happy Sewing!
-Courtney Soleil

Monday, January 10, 2011

Suprise Cookies...

Ok, I'm on a baking roll tonight (maybe I am hungry or sugar deprived?), I just found a perfect recipe on, again, the I Still Love You blog, for Spritz Cookies, and I think adding this type of cookie with some melted chocolate and butter cream icing will turn out nicely.... don't worry you will see in the next couple weeks what I mean. I may try this Canadian Living recipe for the icing.... unless someone has an amazing Vanilla icing I should try instead - comment away!
Lets just say as a hint that what I plan to make may be slightly similar to these Home Made Oreo Cookies... Just sayin'...

Happy Baking!
-Courtney Soleil

Sunday, January 9, 2011

Strawberry Lemonade Cupcakes

I found a post at I Still Love You for these delicious looking cupcakes and thought I should share it here. I will for sure give these yummies a whirl and let you know how it went! (pictures will be provided of course!)
-------------------------------------------------------------------------------------------------------------
Strawberry Lemon Icing
from the kitchen of Melissa Esplin
makes enough to frost about 1 1/2 dozen cupcakes
1 tablespoon lemon juice
4-6 fresh strawberries
1 cube or 1/2 cup butter, softened
2 cups powdered sugar
Puree strawberries & lemon juice in a blender. Allow strawberries to macerate for about 10 minutes; it helps with the flavor. With a hand mixer beat strawberry mixture, butter and sugar until consistency is smooth. You may want to add more sugar or more lemon juice to get your preferred consistency. Frosting is perfect for sugar cookies, cupcakes, cakes, etc.
-------------------------------------------------------------------------------------------------------------
It seems to me I have seen other fellow bloggers attempt this recipe also, I have read nothing but stellar reviews - let's see if we can win Kevin over - he likes his baked goods, but not too far to the sweet side.

Happy Baking!
-Courtney Soleil

Wednesday, January 5, 2011

Piggy Hooded Towel, with a twist!

So a while back I was walking through Zellers (this does NOT happen often, it just happened to be the only store like it anywhere near my work, damn downtown core  and lack of Walmart!) and I found a bin of washcloths in packs of 12 for 3$, steal! I bought 4 packs - I know, I know, who really needs that many right??? Well I had an idea, my nephew Linc has a blue and brown theme nursery - perfect, the washcloths were lt brown, lt blue, peachy-ish and white - I thought what can I make for him?? I had been planning to make him a hooded Piggy towel (his parents love pigs and hippos...) and I was trying to find the right pink for a towel...
So suddenly I had a better idea... completely out of the box - I cut 8" squares from the wash cloths then pieced them all together, pre-washed the now patch work towel, and used some pink flannel (also pre washed, 7$ from Walmart) and backed it, added a hood face and ears.... I hand stitched the face with colour-fast thread and made the ears stand up (kinda) with interfacing - Voila Piggy cuteness. (sorry about picture quality, I forgot to do pics before I wrapped it)


It's a little big for a 7-8mo old but he will grow in to it... and Kevin was sweet enough to show what it looks like on a full size head.... what a good man! 

There's more than one way to sew a hooded towel.... Get creative!
Happy Sewing!
-Courtney Soleil

Monday, January 3, 2011

Baby Quilt Tutorial

Hello Everyone! This is my first Quilt EVER, and it's the project that really gave me back the "sewing bug", so it's only fitting it be my first project post, right? This is a VERY BEGINNER Quilt.
**********************************************************************************

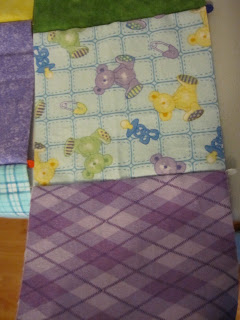
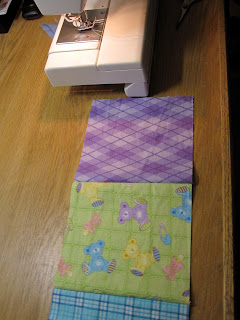
Step 1. Pick out your fabrics, (I used Baby Flannels from Fabricland) and pre wash them all, because I had cotton I used HOT water.

Step 2. Create a Template of what colours/patterns go where, and establish the size you want to use. I went with a 9x6 block pattern with a border - 6"squares, I just used a square blocks grid pulled of the internet. I decided my sizing is a little odd (live and learn...) so I went with a 6" border on the sides and 3" border on top and bottom.

Step 3. Using a 6" ruler, a Self Healing Cutting Mat and a Rotary Cutter, cut out required number of squares, using your template. ( I got a Quilters starting kit at Walmart by "Unique" for cheap like 12$, came with the whole shebang including flag and safety pins and a thimble! The cutting mat that came with my kit was only teenie, so for another 25$ I got a 18"x24" cutting mat and upgraded to a 6"x24" fiskars ruler, both also from Walmart - the kit was worth it just for the rotary cutter, at fabric/quilting shops they run 30-60$ a pop!)


Step 4. After laying out your squares as drawn in your template, pin together squares, facing good sides together... be sure the pins are pinned point toward the edge you start sewing from, that was pins will be easy to take out as you go. (Now obviously if you are more skilled, you can skip this step... I was not at the time....)


Step 5. Once pinned, lay out all your rows in order like on the template... then start sewing the pinned edges of your squares together, referred to as "piecing" - leaving a 1/4" seam allowance.


Step 6. Okay, Now you need your Iron and Ironing Board... once ALL the squares are pieced together in rows, iron all the backs of the 1/4" seam allowance down.


Step 7. Sew all the rows together in order either top to bottom or bottom to top, totally up to you here. I kept a close eye on my template so I was sure I didn't have any mishaps...
  Again, Iron the seam allowance down......
Step 8. Now for the border... Cut your border desired size, I decided a plain blue would be too plain so i used some yellow in the corners...  attach the border around all 2 sides same way as you would sew the pieced rows together...


Your Quilt top is now done!

Step 9. Now you want to make a quilt "sandwich" - lay out your backing fabric  down on a large table or hard surface floor - you can tape it down - the put your batting on top ( backing and batting should be about 2" larger all the way around) then on top place your quilt top. Now there are many methods to finish a quilt from here, I am going to tell you how I did THIS one. Safety pin about every center of each square (about hands width apart...) catching all 3 layers together. Instead of 'quilting' this quilt, I felt I was not experienced enough at the time (and my OLD Janome was evil...), so I opted to use embroidery floss (MAKE SURE IT'S COLOUR FAST!) and sew each corner of each square through to the backing, I trimmed my "tied" ends so there would be no chewing on them from the baby this was for...

After all the corners are stitched together, its a good idea to use the rotary cutter and ruler to even off the edges, and I like to do a basting stitch all around the edge to hold it together, this will save you when it comes to binding - if your lucky you might even have hair left after the next step....
Step 10. Now for the binding... This part I hated the most,  I actually used Satin Binding, which you can buy in a package from Walmart or a Fabric store... it's around 6$ for a 4yrd package but if you are frugal like me, you can score a sweet bargain bin deal for .40 cents a package... 
To attach binding just sew either a straight stitch or a zig zag (your choice, test which you think looks better...) and go all the way around catching on the top, the on the other side go all the way around stitching "in the ditch", basically stitching in the same stitch line as the top. You should know in advance, Satin Binding may be soft and lovely, but it is pure evil... it puckers like crazy as you can see, I had to do mine twice! You will need to mitre corners and if one binding package is not enough you will have to attach the pieces together - ok so I don't have a step by step for either of those steps, but I found a million online to help me - and hey gimme a break, it's my first time doing a tutorial, I'll do better next time, I promise.
 How lame! I can't even find my great final pic of this project, I'll get back to you with it when I do!
I know it wasn't perfect, but my little nephew Linc LOVED it!
Happy Sewing!
-Courtney Soleil ;-)


Saturday, January 1, 2011

Hello New Blog!

Here it is, my first attempt at blogging! I think it is fitting to start the new year off right! I have been reading so many great crafty-sewie blogs that I just couldn't help starting one of my own. I can't wait to post all my crafty projects - I guess I have been preparing to start a blog for a while because I already have tutorials ready! I have been making everything from quilts to cup cakes this last while and I can't wait to share them - plus I have so many things I want to make still, my imagination is running wild!
My Hubby just bought me a brand new sewing/Embroidery machine for Christmas (don't worry, I have pictures coming!!!) so now the sky is the limit! I hope to have guest blog/tutorial posts from others once I get up and running, and since my Momma is one of the most talented people on earth, I will definitely be showing off some of her projects - and hopefully once she becomes computer literate (if ever) she can start a blog of her own and share her own masterpieces. Stay tuned, can't wait for you all to see my coming posts!