
**********************************************************************************
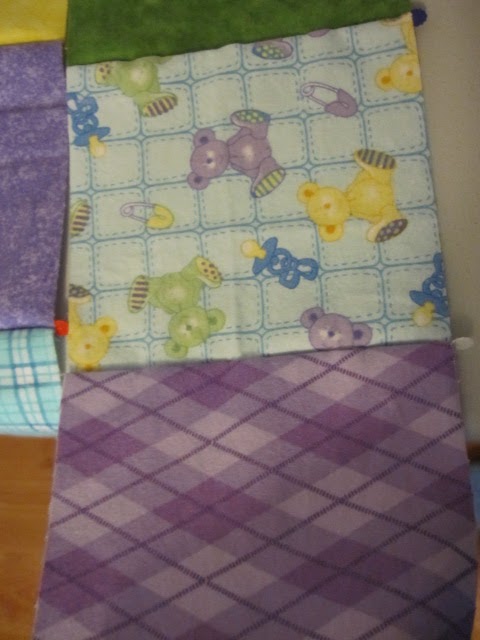
Step 1. Pick out your fabrics, (I used Baby Flannels from Fabricland) and pre wash them all, because I had cotton I used HOT water.
Step 2. Create a Template of what colours/patterns go where, and establish the size you want to use. I went with a 9x6 block pattern with a border - 6"squares, I just used a square blocks grid pulled of the internet. I decided my sizing is a little odd (live and learn...) so I went with a 6" border on the sides and 3" border on top and bottom.


Step 4. After laying out your squares as drawn in your template, pin together squares, facing good sides together... be sure the pins are pinned point toward the edge you start sewing from, that was pins will be easy to take out as you go. (Now obviously if you are more skilled, you can skip this step... I was not at the time....)

Step 5. Once pinned, lay out all your rows in order like on the template... then start sewing the pinned edges of your squares together, referred to as "piecing" - leaving a 1/4" seam allowance.


Step 6. Okay, Now you need your Iron and Ironing Board... once ALL the squares are pieced together in rows, iron all the backs of the 1/4" seam allowance down.


Step 7. Sew all the rows together in order either top to bottom or bottom to top, totally up to you here. I kept a close eye on my template so I was sure I didn't have any mishaps...

Again, Iron the seam allowance down......

Step 8. Now for the border... Cut your border desired size, I decided a plain blue would be too plain so i used some yellow in the corners... attach the border around all 2 sides same way as you would sew the pieced rows together...


Your Quilt top is now done!

Step 9. Now you want to make a quilt "sandwich" - lay out your backing fabric down on a large table or hard surface floor - you can tape it down - the put your batting on top ( backing and batting should be about 2" larger all the way around) then on top place your quilt top. Now there are many methods to finish a quilt from here, I am going to tell you how I did THIS one. Safety pin about every center of each square (about hands width apart...) catching all 3 layers together. Instead of 'quilting' this quilt, I felt I was not experienced enough at the time (and my OLD Janome was evil...), so I opted to use embroidery floss (MAKE SURE IT'S COLOUR FAST!) and sew each corner of each square through to the backing, I trimmed my "tied" ends so there would be no chewing on them from the baby this was for...


After all the corners are stitched together, its a good idea to use the rotary cutter and ruler to even off the edges, and I like to do a basting stitch all around the edge to hold it together, this will save you when it comes to binding - if your lucky you might even have hair left after the next step....

Step 10. Now for the binding... This part I hated the most, I actually used Satin Binding, which you can buy in a package from Walmart or a Fabric store... it's around 6$ for a 4yrd package but if you are frugal like me, you can score a sweet bargain bin deal for .40 cents a package...
To attach binding just sew either a straight stitch or a zig zag (your choice, test which you think looks better...) and go all the way around catching on the top, the on the other side go all the way around stitching "in the ditch", basically stitching in the same stitch line as the top. You should know in advance, Satin Binding may be soft and lovely, but it is pure evil... it puckers like crazy as you can see, I had to do mine twice! You will need to mitre corners and if one binding package is not enough you will have to attach the pieces together - ok so I don't have a step by step for either of those steps, but I found a million online to help me - and hey gimme a break, it's my first time doing a tutorial, I'll do better next time, I promise.


How lame! I can't even find my great final pic of this project, I'll get back to you with it when I do!

I know it wasn't perfect, but my little nephew Linc LOVED it!
Happy Sewing!
-Courtney Soleil ;-)
No comments:
Post a Comment